| |
|
April Preschool's Lesson Plan – Earth Day – One Day Theme – Free Sample
|
|
|
Preschool Curriculum Free Sample

Earth Day
View April Preschool Curriculum – Free Sample Below
|
|
|
Preschool Lesson Plans
April 22nd
Earth Day Theme – One Day Free Sample
|
Post a note
to the parents –
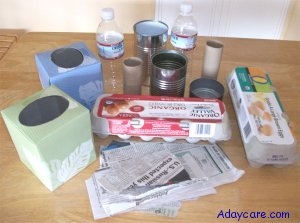
see if they can donate some clean recycled items such as egg cartons, metal cans (no sharp edges) small plastic water bottles, cereal boxes, toilet paper rolls, Kleenex boxes, newspaper and old calendars (or calendar pages from January, February and March).
|
Day 1
Circle Time:
Let’s Recycle – Activity
This morning you will tell the children’s its earth day and tell them that this means that we are trying to keep our planet "green" and one way to do this is by recycling. Ask if anyone knows what recycling means. Explain to the children that this means we will not throw away items we can reuse, such as glass jars, paper items, metal cans, etc
Let’s Recycle – Activity
You will need: several egg cartons, clean metal cans (no sharp edges), plastic empty small water bottles, clean old newspapers (ripped into strips) and toilet paper rolls, five sturdy cardboard boxes (if you don't have any on hand you can ask at your local grocery store).
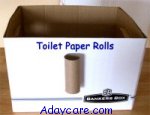
To begin: Set up the five boxes, side by side, and place one of each of the items listed onto the boxes, one item on each box, attach the items by taping or gluing them onto the boxes. In the pictures above on the left hand side is some of the recyclable items the children will use today and on the right hand side is our toilet paper box and we taped the toilet paper roll to the box to make it easy for the children to know where to put the items they are going to recycle today.
You may find some of the items are too heavy to attach to the box by tape, those items may need to be hot glued onto the box, and they can be pulled off the box later and recycled.
Have the children gather together and explain to the children that they are going to play a fun game of recycling today! Show them all the recyclable items and tell them how they will help you sort all the recyclables, show them the toilet paper rolls in the pile of items and how they would go into the box that has the toilet paper roll on it.
Then ask the children, which box will I put the plastic bottles? Does anyone know where we I would put the tissue boxes? Where would I put the metal cans? Who can show me where the newspapers go? Then say something like, Wow, your all so smart, I think you will all find this game a lot of fun, and remember, if you need any help, just ask me, and I will be glad to help you figure out where the items go, are we all ready? Hmm who’s going to go first today, who is our leader today? Etc.
Have the children sit in a circle and take turns picking out one of the items from the pile of recycles (egg cartons, metal cans, plastic water bottles, newspaper, toilet paper rolls) and have them sort the item they picked up by placing it into the box with the same item that is taped or glued to the box.
Song/Finger Rhyme:
Recycle This, Recycle That
Tune to "Open Shut them, Open Shut Them"
Recycle this, recycle that. (Hold up one bottle then both bottles)
Give yourself a tap, tap, tap. (Tap bottles together X3)
For you recycled this and that! (Hold up one bottle then both bottles)
Give yourself a tap, tap, tap. (Tap the bottle together X3)
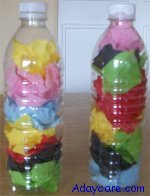
Directions: You will need two sturdy clean water bottles per child. Give each of the children some one inch squares of colorful party streamers (crepe paper), or let the children rip up the paper streams and poke the pieces into their bottles. When they are done teacher will place a few pumpkin seeds or a few pebbles inside with the scrap pieces of crepe paper so when they shake the bottles they will make a sound.
Make sure you put all the covers on tightly and let them use them with this song and then put them away until you can get a chance to hot glue the covers on (do not use the hot glue when the children are present it is extremely hot) Teacher will need to hot glue the covers on, make sure they are secure before giving the bottles to the children to take home.
Ask the children what they used to make their shakes with. They used paper and plastic. Tell them the bottles they used to make their craft today are made from plastic and inside their bottles are papers, and both of these items that they used to make their shakers today are items that we need to remember to recycle "paper and plastic", and since they used them to make a craft they recycled today! They did a good job recycling!

Art Project:
Mr. Recyclable Bug – Craft
Tune to "Open Shut them, Open Shut Them"
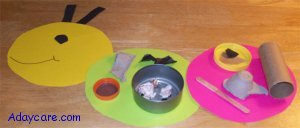
Teacher should make her Recyclable bug before the children come to daycare today. Make a poster that says "catch the bug, Please Recycle" underneath.
The caption "catch The Bug, Please Recycle" is referring to when people get sick and they say I have a virus or a "bug" and these types of "bugs" spread quickly from one person to another, and then everyone is getting sick, well we are hoping that everyone will catch "the recycle bug" and help to make our planet a lot greener!
To begin, teacher will hold up her Mr. Recyclable bug or attach him to the wall and show him to the children at craft time today. Explain to the children that this is Mr. Recyclable Bug and he looks for garbage that can be recycled and he collects it and carries it along to the recycling center, but it’s a lot of work and he is getting tired and there is way too much garbage for him to do this all by himself and he could really use some help from them.
Ask the children how they can help Mr. Recyclable Bug?
Explain to them that if they recycle glass, paper, cans, cardboard and other recyclable items they will help Mr. Recyclable bug he wont have to do it all by himself anymore and he wont be so tired, he has to find garbage day and night and right now and he hardly gets any sleep and every time he thinks he has found all the garbage, guess what! He finds more the next day and that makes him very sad. But when he sees you recycle that makes him very happy and he doesn't have to work so hard picking up all the trash, so let’s try and make Mr. Recyclable bug happy by recycling our trash!
Ask the children if they recycle at home, if not, remind them to tell mom and dad about Mr. Recyclable bug and how happy it would make him if everyone recycled at least one thing each day such as newspaper, glass bottles, metal cans, cardboard, etc.
Now have the children make their own Mr. Recycle Bug
You will need: Cardboard cereal boxes and cut out large circles from the boxes and have the children paint the circles any color they would like, hang them onto an outside clothesline or near an open window to dry quickly, after their circles dry, have the children glue on recyclables items to make their very own Mr. Recyclable bug.
Have them glue on items such as clean and washed out tuna cans, large jar covers from peanut butter jars, mayo jars, plastic yogurt covers, toilet paper rolls, scraps of newspaper, or scraps pieces of paper from flyers, popsicle sticks, pieces of egg cartons or anything else that you would normally throw away to teach the children many items we throw away each day could be recycled.
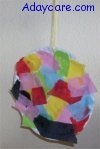
Learning time:
Tap The Circle
You will need: Cardboard cereal box or cracker box, scrap pieces of party streamers (crepe paper) or other types of scraps of paper, yarn, hole punch, 2 small milk cartons, packing tape, paper towel roll.
Circle: you will need a cardboard cereal box or a large cracker box and cut it into a large circle and glue on some pieces scraps of paper such as tissue paper, party streamers, construction paper or any other kinds of scraps paper that you have in your craft area. After you have finished gluing the circle, set it aside to dry. Then you will need to hole punch the top of the circle and attach a piece of string or yarn and hang it from the ceiling.
Cube (die): You will need to make a cube (die), you can make one from two small clean washed out milk cartons. Cut the milk cartons in half, and push the two open ends together, tightly, and cover with squares of cardstock paper and write on low number such as 1, 2, 4 1, 2 onto the cube, you should now have a number on each side. To make the cube (die) durable cover it with clear packing tape.
Activity: Have the children sit in a circle and take turns shaking the cube (die) if they shake a four, teacher will pass them the paper towel roll and then will go over and tap the circle (which is hanging from the ceiling) four times. Teacher and all the children will count out the taps, 1, 2, 3, 4. Now have the next child shake the cube (die), continue until everyone has had a turn.
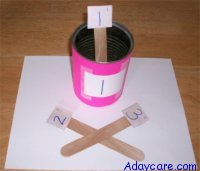
Letter/Number:
Calendar Number Match Up
You will need: Calendars with the numbers on them, such as the calendar pages from January, February and March, metal cans, craft sticks and tape or glue.
Directions: You will need several calendar pages (ask parents to recycle their old calendar pages by bringing them in) and cut out the squares with the numbers 1 – 10 on them.
Glue one of each number onto a craft stick. We found that on our calendar all the numbers were very small so we wrote the same number onto the squares with a marker in very large numbers. (See picture above)
To make the cans look nicer you may want to cut some strips of cardstock paper and wrap around it around the can like a blanket and tape it. Then we recycled our mail by cutting out squares from the backs of the envelopes that we put onto the cans to write the numbers 1, 2, 3 10. Put one number onto each square and tape the squares onto the cans. (see picture above)
Next, teacher will need to set the cans in a row starting with the number 1, 2, 3 10 Lay all the craft sticks face down onto the floor.
Activity: Have all the children sit in a circle around the calendar number craft sticks and have them take turns picking one calendar number craft stick from the floor and holding it up and telling you what calendar number is on the craft stick. Have them match the craft stick by number to the can with the same number, and place the craft stick inside the can with the same number, repeat with the rest of the children.
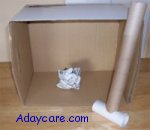
Special Activity:
Lets Play Golf!
You will need: Some large sheets of newspaper, paper towel rolls, toilet paper rolls, clear packing tape and small to medium sized sturdy boxes.
This is an outside activity.
Golf Activity: Show the children how they can hit the paper ball with their toilet paper golf club, and try to hit the paper ball (swing like their playing mini golf) and try to get the paper ball into one of the boxes on the playground, once they get the ball into one of the boxes have them remove the paper ball and try to golf it over to another box.
Golf Club: To make the golf club you will need a paper towel roll and two toilet paper rolls. You will need to cut a hole in the center of the toilet paper roll, trace around the paper towel roll onto the center of the toilet paper roll and cut out and carefully push the paper towel roll inside, and then if you find the golf clubs are not long enough, you will need another toilet paper roll or paper towel roll and carefully squeeze it into the end of the paper towel roll, it will be very snug and a bit hard to push in, after you get the toilet paper roll pushed into the paper towel roll go around it with clear packing tape so it will stay together.
Directions: Have the children help you squish up a few large sheets of newspaper to look like paper balls and then take the paper balls, golf clubs and boxes all outside. Lay the boxes randomly around the playground and not too close to each other.
Download Lesson Plans & Printable Pages

Free Sample – One Day Lesson Plans – Earth Day Theme
<--Right mouse click the file – do a "save as" to your computer to save the file to use later.
|

Instant Access!!
April Preschool Curriculum – $15.00
|
|
|
|
Week 1
Weather Theme
|
Week 2
Spring Theme
|
Week 3
Bunny, Chick & Lamb Theme
|
Week 4
Community Workers Theme
|
|
Four Weeks Of Lesson Plans!!
April Preschool Curriculum
|
|
|
|
Instant Download !!
April Preschool Curriculum $15.00
|
|

|
|
|
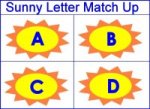
Sunny Letter Match Up
|
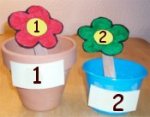
Plant Pot
Flower Number Match Up
|
Cloud Number
Work Sheet
|
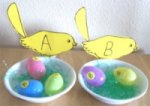
Match Up The Eggs
To The Birds By Letters
|
|
|
|
Printable Activity Pages
View Some Of April's Printable Pages
Print Out games, craft patterns, coloring pages, work sheets and activities
|
Click Here To View
April Preschool Curriculum – More Pictures
|
|
Receive Password Instantly
After Purchase
|
|
|

|
Littel Bear Spring Story
Print Out
|
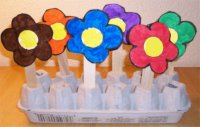
Flower Garden
Activity
|
Seed Craft
Spring Theme Activity
|
Caterpillar
Color Match Up
|
|
|
|
OurApril Preschool Curriculum Includes
Five Days Per Week
Circle Time, Song/Rhyme Time, Art time, Learning Time
Plus! Letter/Number Time & Special Activity Time!
|
Click Here To Buy
April Preschool Curriculum – More Pictures
|
|
|
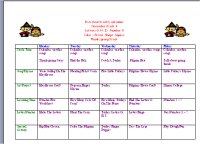
April's Weekly Calendar
Preschool Weekly Calendar
Preschool Lesson Plans
April Week 2
Letter W – Number 10
Spring Week
| Daily Activities |
Monday |
Tuesday |
Wednesday |
Thursday |
Friday |
|
Circle Time |
Calendar, weather, songs Bird Egg Match Up
|
Calendar, weather, songs Match The Garden Cards
|
Calendar, weather, songs Match Up The Flowers
|
Calendar, weather, songs Caterpillar pom–pom Sort
|
Calendar, weather, songs Spring Time – Wake Me Up – Match Up Game
|
Song/Rhyme |
This Is The Way The Bird Flies
|
Veggie Garden Song
|
There Are Flowers In The Garden
|
Two Little Caterpillars
|
Frog Rhyme
|
Art Project You will find the directions for all the activities in the lesson plans. |
Bird, Nest & Eggs
|
Large Seed Craft
|
Pretty Flowers
|
Paper Plate Caterpillar
|
Hibernating Animals & Amphibians – Wake Up
|
|
Learning Time Printable activity pages for all games, coloring pages, etc. can be downloaded after purchase. |
How Many Eggs Worksheet
|
Plant The Seeds
|
Sorting Seeds
|
Caterpillar Writing Page
|
Swat The Fly
|
|
Letter/Number Time
|
Letter Ww Letter
|
Pick The Weeds
|
Flower Number Match Up
|
Caterpillar 1 – 10
|
Writing & Coloring Page For Letter W
|
Special Activity |
Who Has The Egg Game?
|
Shake The Seeds
|
Plant the Flowers
|
Time To Feed My Caterpillar Coloring Pages
|
Feed The Frog
|
|
|
|
Print Out Activity Calendars
Receive Four Activity Calendars For Each Month Purchased
Instant access – $15.00 Per Month – Order Below!!
|
Click Here To Purchase
Preschool March Curriculum $15.00
|
|


Click On The Shapes Above
For More Information
|
|
|
View Preschool Curriculum
Sample 1 January – Teddy Bear Week
|
View Preschool Curriculum
Sample 2 February – Valentine’s Week
|
View Preschool Curriculum
Sample 3 March – St. Patrick’s Week
|
View Preschool Curriculum
Sample 4 April – Spring Week
|
View Preschool Curriculum
Sample 5 May – Flower Week
|
View Activity Calendar
View Some Examples
|
View Poster
View Some Examples
|
View Activity Pages
For October
|
View Sales
$$ Save Money
|
Click Here To Purchase
|
View
Preschool Curriculum $15.00 Per Month
Click the month above to view
View
Activity Pages Included With Curriculum
Click the month above to view
|
|
View FAQ
Find Answers To Your Questions
|
View Contact Information
|
View Telephone Orders
By Phone, Fax or Mail
Call (800) 591-4135
|
Purchase Curriculum

Order Now – $15.00 Per Month
|
Preschool Curriculum Program
Our preschool curriculum program
is geared towards children 2.5 up to 5 years old.
Our curriculum is aimed at teaching the children their shapes, colors, upper and lower case alphabet and numbers, learning to tell time, learning a few beginning sounds, simple science activities and so much more. Children will be using glue, paint and working on learning how to cut, trace, tell time plus work on pre math, pre reading, and science. Some of the simple science projects would be sorting fruits and vegetables, growing grass, watching an ant farm and so many other exciting Activities!!
Our todder curriculum program
is available for every month of the year.
Our toddler themes are geared towards children 16 months to about 2.5 years. Our toddler program provides lessons on teaching the toddlers their colors, shapes, numbers up to 10, and some of their alphabet. These lessons are for children beginning to paint and glue. We also provide the words to songs/finger rhymes along with other fun activities. Our toddler curriculum is sold seperately, please click here to view our toddler program.
How Our Program Started.
We decided to develop a toddler/preschool curriculum program because we couldn't find one that we liked.
We have worked very hard at developing a good toddler/ preschool curriculum program. I bought several books on Preschool Themes and even tried a few programs that delivered every thing to your doorstep. My problem was that became expensive and the books I purchased were not quite what I was looking for. I would go through the whole book only to use one or two activities. I was determined to have a Great Toddler/Preschool Program. I have taken several classes on creating your own curriculum and have learned a lot of new ways to teach children. So I finally decided it was time to come up with my own curriculum. I find my program works really well with my home daycare but all the activities will work for a larger daycare setting or preschool or even for Mom who is lucky enough to be home with her child. All children need daily stimulation and my program provides a lot of fun interesting activities. We hope you enjoy the curriculum as much as we enjoyed putting this program together.
Getting Ready For School. We have found that when children are having fun and enjoy what they are doing, they learn quickly, which is what our program is all about, teaching the children through fun activities.
Our program is like providing a mini nursery school and preschool program in your own home. Parents like the idea that their child is having fun participating in daily activities, art projects, songs, finger plays and games, which is teaching them and getting them ready for school.

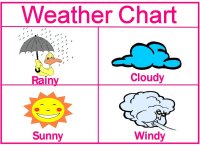
Weather Chart
My preschool curriculum
provides a circle time, art time, learning time and a special activity for five days per week.
We start our morning program off each day with circle time. To begin our circle time, we discuss with the children the weather outside. We have the children look out the window and then we ask them "What is the weather outside?" If you have a lot of younger children they may not be able to answer correctly, then
we give them hints; such as, (Is the sky white or blue?) if its white does anyone know what that means? (It’s cloudy) "Is it raining outside?" Is
snowing outside?" Is it cloudy outside?" Is it windy outside?" We have a weather chart and each day we have one of the children move the arrow to the
correct weather for that day. The weather chart is included in the toddler or preschool curriculum.
Next we focus on the calendar.
I will ask the children "Does anyone know what day it is?" If no one knows what day it is, I
will tell them, "Today Is Thursday." I made a felt calendar with numbers that have Velcro on their backs to stick to the calendar. The children take turns
putting up the numbers each day to show that days date. The Toddlers are too young to understand what a calendar is but they still have fun sticking up the
numbers. Our calendar is in my dining room and the children need to climb up into a chair to be able to reach the calendar to put on the numbers. I always
stand nearby when they are climbing onto the chair incase they start to fall. After the number for the day is put up, we start at number one, on the calendar
and I have the children count with me, to the new date that we just placed onto the calendar. As they say the numbers I point to the numbers on the calendar
to help to teach them their numbers.
Circle Time –
We start our Toddler / or Preschool Program off each day with circle time. We try to get all the children to sit together in a circle on the floor. We never force any child to participate, but we do try to encourage participation. You will find in the daily lessons which activity to do each morning for circle time. Our circle time activities could be a talk or discussion but usually involves a fun activity such as a learning activity, games, singing songs, hearing a story, etc.
Fun Way To Learn –
We have found a lot of fun ways to help the children to learn while they’re having fun. After out circle time activity we focus on the calendar. I made a Velcro one with Velcro numbers. The children take turns putting the numbers up each day. Toddlers are too young to understand what a calendar is but they still have fun sticking up the numbers and singing our seven days of the week song. All the older toddlers can sing most of it.
|
Seven Days Of The Week Song
There are seven days in the week, seven days in the week. There are seven days in the week. "Hold up 7 fingers"
And I know them all. "Point to self"
Sunday, Monday, Tuesday. Wednesday, Thursday, Friday. Saturday is the last one. Saturday ends the week. "Teacher will point to each day on the calendar"
Repeat song.
|
Singing Songs And Reciting Rhymes -
Each week we teach the children a few new songs or rhymes for that week's theme.
Children like repetition so don't be afraid to sing any song the children really like on a daily basis, but try to add a few new ones each week. Don't expect the toddlers to sing with you but they really enjoy music so please sing. In time they will be able to copy the hand movements to the songs and nursery rhymes they hear often and before you know it they will start to sing a word or two. Be sure to include some of the children's favorites each week. Some of our children's favorites are listed below.
Weather Chart -
The weather chart is included in every monthly curriculum package.
We start our morning program off each day with circle time. To begin our circle time, we discuss with the children the weather outside. We have the children look out the window and then we ask them "What is the weather outside?" If you have a lot of younger children they may not be able to answer correctly, then we give them hints; such as, (Is the sky white or blue?) if its white does anyone know what that means? (It’s cloudy) "Is it raining outside?" Is it snowing outside?" Is it cloudy outside?" Is it windy outside?" We have a weather chart and each day we have one of the children move the arrow to the correct weather for that day.
Art Time -
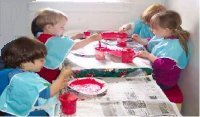
There is a daily art project (craft) for the children to do each day that goes along with that weeks theme.
After circle time we have the children come to the table and sit down and get ready for art time. Look in your Toddler or Preschool lesson plans to see which craft you will be doing that day, and if you need to print anything out for that days craft. If we are going to use glue I place the glue into tiny plastic cups such as the kind you get with the sample play dough. I only put a small amount in the cup; just enough for that days project. I give the toddlers large brushes to use and the preschoolers smaller ones. If we are going to paint I make sure each child has some type of paint shirt on. If you do not have enough paint shirts, you can always use an old sweat shirt and cut off the arms. Anything will work. We use our old and stained up wash clothes for paint rags. I just wet the paint rag and it keep it handy for spills or for a child who is done before the others, or we may keep a dish pan with a small amount of water in it for the children who finish early to rinse off until they can get into the bathroom to wash up with soap and warm water.
Preschool Learning Activities -
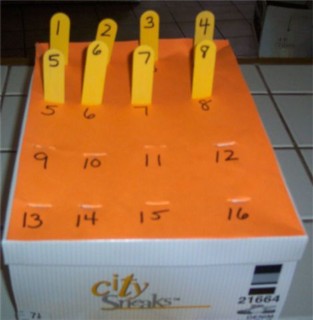
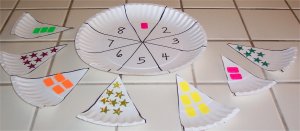
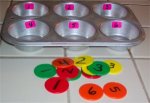
Above are a few examples of some of our preschool learning activities.
These activities are made from easily accessible materials and provide a fun learning experience for the children. Our program also offers learning activties can be a work sheet, coloring page, a game, puzzles, bug hunt, ant farm, nature walk and other fun idea's. These activities are to teach the children about sharing, numbers, alphabet, shapes, colors and much more! The activities shown above may not be available for the month you are purchasing but similar activities are available for each month.


Special Activities -
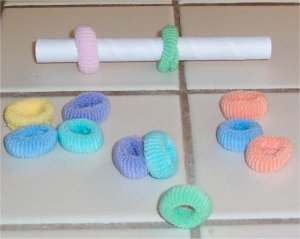
Our preschool program also provides special activities for each day.
Please view the examples above. The first picture the one with the flowers is an activity where the children will go on a flower hunt and collect plastic flowers. The next picture show an activity where the children will feed the puppy some bones and the picture shows an activity of putting hair scrunches onto a card board base. Each monthly program has different monthly activities. The ones shown above may not be available for the month you are purchasing but similar activities are available for each month.
|
|
|
| |
Click The Links Below
|
|
|


![]()





 Contact Me